This is a wonderful article on Pantry Organization is on the following website: http://www.squawkfox.com/2012/07/02/pantry/
Squawkfox also provides some printable helps which you can download from their site. I recommend you check them out. I will picture some of them at the end of the article.
1. Raid the pantry.

The best way to start organizing your pantry is to empty your
cupboard and group your foods by type on the floor. It doesn’t matter if
your pantry is a walk-in room or a modest kitchen cabinet — empty the
lot to make the most of this exercise.
Canned goods in one pile, dried beans in another, spices in a stack, and baking goods far away from the kids.
Seeing your wares together on the floor can help you see what’s in
stock and what’s been hanging out in your kitchen since the 80s.
2. Archive the artifacts.
Make note of all the expired items you’ve been storing in dire need
of a compost bin or trash can. Check over your canned goods. If they’re
expired, rusting, oozing, or bulging, toss them out!
Scrutinize the non-expired stuff you’ll never eat and donate it to
your local food bank. You’ll clear space for foods you enjoy, and
perhaps make better use of your pantry when
preparing meals in the future.
Also, be sure to open and inspect all bags, boxes, and canisters
containing grain products. Many bugs, but mostly weevils, love breakfast
cereals, crackers, cookies, cake or muffin mixes, pastas, and pancake
powder. They also love big bags of warm flour. If you spy a fly or bug
lurking in your Wheaties, be a champ and get rid of the bag.
Kill Bugs Cold: Weevils do not like the cold. If you’re
unsure about the insect activity in your flour, an alternative to
chucking (what might be perfectly good food) is to freeze questionable
items for at least four days. The cold kills eggs, larvae, and weevils.
To prevent future infestation, find some space in your freezer and freeze them cold. Our family stored all bags of flour in the deep freeze full time. It
was a smart way to prevent food waste, and the move saved my parents
some needed sanity.
For those with small freezers who cannot afford the space, be a smart
shopper and buy smaller portions of these products and use them
regularly.
Your kitchen floor or countertop may look like a disaster. Don’t worry — things often get worse before they get better. Hugs.
3. Get scrubbing.
I lied. Things will get better in a minute. First, grab your vacuum and
get down with the biggest de-crumbing you’ve endured since discovering
that chowing on potato chips often sends flying potato pieces straight
into your cleavage (if you’re a woman).
Be sure to vacuum all cracks, crevices, cleavages, and spaces where
grains of food could be hiding. If your pantry shelves are lined, remove
the contact paper — you can reline later.
Grab a clean cloth (I use microfiber) and wipe down your pantry using
a mixture of warm water and a few drops of dish detergent. Wipe it dry.
Reline your shelves with your preferred liner (
IKEA sells some), or stock up on reusable
non-adhesive shelf liner — just cut to size.
4. Do a pantry inventory.
With a clean pantry nearly ready to rumble, it’s time to take inventory.
Why keep an inventory?
A pantry inventory details what you have stocked, shows what needs to be added to your
grocery shopping list, and may inspire you to make meals with the ingredients you have on hand.
Keeping a pantry inventory can help with
meal planning
since you’ll know what’s at home and what needs to be purchased. An
up-to-date inventory can also make shopping less wasteful, saving you
big money on your grocery budget. Who knows, maybe you can skip a
supermarket trip!
What to record:
Item: What’s in your pantry? List canned goods, rice, dried beans, spices, cereals, snacks, quinoa, oatmeal, etc.
Quantity: How much is in stock? Do you have canned
tomatoes to make stew this week? Quantity is an ongoing itemization of
what you have in stock and what is about to run out. Make sure the kids
update this column too!
Item Cost: You keep your grocery receipts, right?
Go ahead and list the money spent on your food. It’s easiest to update
when you’ve just done the groceries and restocked your pantry. This
column can be a real eye-opener when you add up the total cost.
If you’re loving this level of organization, go ahead and check out this
very popular post on
refrigerator organization.
5 Steps to a Freshly Frugal Fridge
What’s inside your refrigerator? Prevent food waste and save money by
getting your fridge organized and storing items in the smartest spots.
Lots of helpful tips, great graphics, and easy steps to keep your food fresher, for longer. Check out
The Organized Fridge for the details.
When you’re done listing all your pantry wares, stick your inventory on the inside of a door. Update as needed.
5. Get in the zone. Reload.
Before restacking everything back on the same old shelf, consider the
spots where everyday foods could be placed to make access easy. For
example: Shoving your favorite breakfast cereal behind a wall of canned
goods is a bonehead move, unless you’re hiding those tasty oats from a
kiddlet or husband.
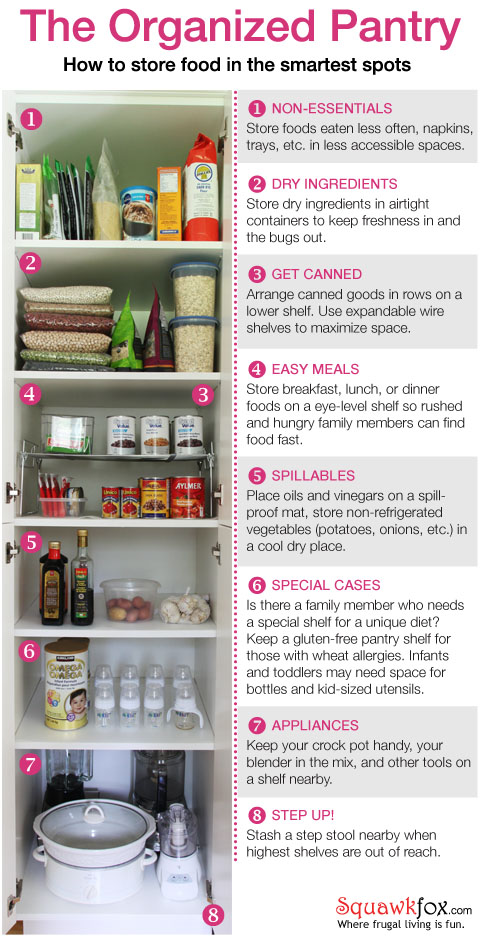
Pick a pantry zone.
A few organizational ideas to get your pantry perfect:
 Zone 1: Non-essentials.
 Store foods eaten less often, napkins, trays, etc. in less accessible spaces.
 Zone 2: Dry ingredients.
 Store dry ingredients in
airtight containers to keep freshness in and the bugs out. Clear
containers alert you to when stock is running low.
 Zone 3: Get canned.
 Arrange canned goods in rows on a lower shelf. For safety, don’t stack high. Use wire shelves to maximize space.
Zone 4: Easy Meals. Store breakfast, lunch, or dinner foods on an eye-level shelf so rushed and hungry family members can find food fast.
 Zone 5: Spillables.
 Place oils and vinegars on a
spill-proof mat, and store non-refrigerated vegetables (potatoes,
onions, etc.) in a cool dry place.

Zone 6: Special cases. Is there a family member who
needs a special shelf for a unique diet? Keep a gluten-free pantry shelf
for those with wheat allergies. Infants and toddlers may need space for
bottles and kid-sized utensils.
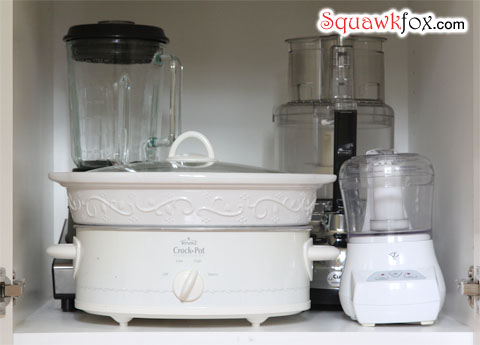
 Zone 7: Appliances. Keep your crock pot handy, your blender in the mix, and other tools on a shelf nearby.
Zone 8: Step up! Stash a step stool nearby when highest shelves are out of reach.
A few pantry organization tactics:
- Get grouped: Group similar stuff together by food
type or meal. Dry goods on one shelf, canned on a second, spices stored
in labeled jars, oils and vinegars on a spill-proof mat,
non-refrigerated vegetables (potatoes, onions, etc.) in a cool space.
- Square containers: Skip the round ones — use square airtight storage containers
to to keep dry ingredients fresh and maximize your space. Square
containers can be easily stacked and waste less space than round models.
Airtight containers are a great tool for preventing insects from
infesting your wheat products.
- Expandable shelves: Expandable wire shelves
double your space and help keep things stacked safely. Place a double
wire shelf in the back of your cabinet and stack canned goods on it.
- Don’t get canned: Never stack canned goods on the
highest shelves or on top of each other — they could topple and make a
mess, damage something, or even injure you. Use a wire shelf as support
to safely stack double-height.
- Shoe racks: Got an old IKEA hanging shoe rack
hanging around your home? Hang it on the inside of the pantry door and
store small items (potatoes, onions, spices) out of the way.
- Bin there: Bins and baskets do a great job of separating and organizing items on pantry shelves.
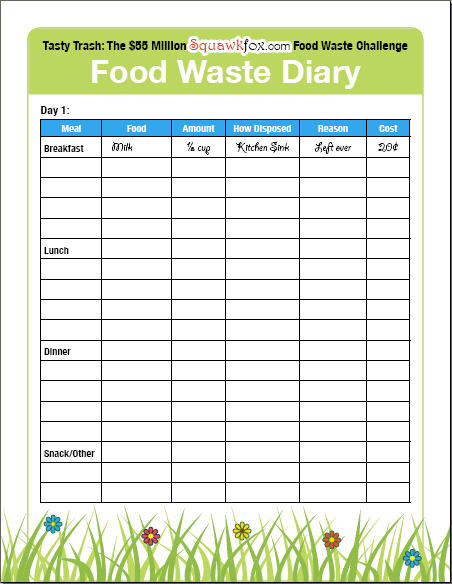
Pantry rotation: Whenever you restock your shelves, rotate older wares forward from the back of your pantry. You’ll keep your food from spoiling (Following are download available from SquawkFox.com )


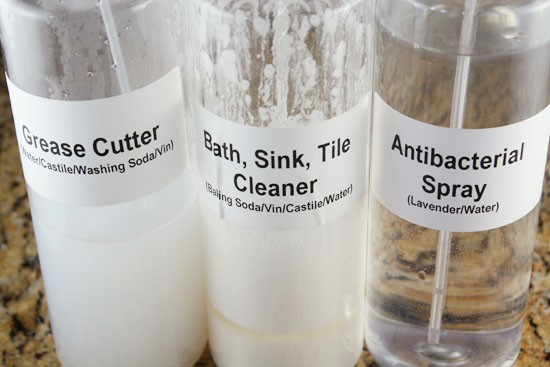
 This was easier than I thought it would be. One of this sites goals for the year was to ditch some of their standard
cleaners that were used around the house and make them! Honestly, I was a
bit skeptical about this project mainly because I wasn’t sure that
homemade cleaners would really get the job done.


