Search This Blog

Friday, July 27, 2012

Another Fabric Softner

DIY – Homemade Fabric Softener – $.01/Load!


homemade fabric softener DIY   Homemade Fabric Softener   $.01/Load!
Items you will need:
(2) cups of hair conditioner
(3) cups of distilled white vinegar
(6) cups boiling water
(1) Mixing utensil
(1) Bucket/Pail/Pot
(1) Empty Bottle (I used an old clean bleach container)
First of all, you will notice in my picture I only have a 12oz bottle of conditioner! Well, I am terrible at math! Not to worry, I had extra bottles so I grabbed a ½ cup out of another bottle!
Many of the recipes you will see out there say cold water is fine, I on the other hand prefer to have the water hot because it helps break down the condtioner, meaning less stirring for me!
STEP 1. Pour the 6 cups of boiling in water into the pail
STEP 2. Add the condtioner
STEP 3. Add the vinegar
STEP 4. Start stirring
fabric softener DIY   Homemade Fabric Softener   $.01/Load!
This whole process took me about 4 minutes! My favorite part …. I get to make the scent myself, not pick one off the shelf, and with the million different scents of condtioner out there, a million different scents to be had!
I did go out an buy the vinegar for $1.82 at Walmart, used  a third of the bottle ($.60) and conditioner I had on hand ($.48)
For a grand total of $1.08! This is a 96 oz bottle that I filled, and according to Snuggle, 96 oz = 96 loads! This makes it $.01 per load!

use sponges let them soak in the softner and as needed pull them out ring it out to about almost dripping throw it in and put it back in the jug when the dryer is done !! works well with us !

Alvin Corn Glass Cleaner

This recipe was collected from:  http://www.crunchybetty.com/battle-of-the-homemade-glass-cleaners.  Love this gal's humor and approach to these things!


This is what I like to call:  Alvin Corn Glass Cleaner
Which, of course, stands for alcohol, vinegar, and cornstarch. I’m good at naming things, right? Any expectant mothers want some ideas?
Okay. So this stuff, it makes your mirrors look like they were just born. Fresh from the mirror womb. Seriously. I haven’t met a Windex or Glass Plus that could produce this kind of streak-free, clean and clear shine.
If I could somehow make my hand as big as my wall, and fashion a band around the mirror, it could double as an engagement ring.
Like a diamond.
Here’s the recipe:

Alvin Corn Homemade Glass Cleaner

  • 1/4 c. rubbing alcohol
  • 1/4 c. white vinegar
  • 1 Tbsp cornstarch
  • 2 c. warm water
Combine everything in a spray bottle, and shake well. Shake well before using, too, as the cornstarch might settle at the bottom (and subsequently plug the spray mechanism if it’s not mixed in well).
Judgment: It’s the best. It wins. We’ve covered this. But let’s look at one more VERY important thing: Cost.
This is all approximate (and I’m erring on the side of expensiveness, so it’s probably less than this), but I think we can agree that I’m probably close on my estimations:
1/4 c. vinegar = $0.20
1/4 c. rubbing alcohol = $0.25
1 Tbsp cornstarch = $0.03
2 c. water = virtually free, except for the water bill part, so let’s say $0.000001
Grand Total: $0.48
For an entire bottle of glass cleaner.
Not to mention, it’s completely nontoxic, you can simply reuse your old glass cleaner bottle over and over and over again (or you could paint a bottle, like I did mine, because it’s tres chic), and you’re not spraying nasty things all up in the air for your kids, spouses, and pets to breathe.
Go you!
Go Alvin Corn!
Yay!

Homemade Furniture Cleaner/Polish


This is another one that I have already tried and do like it!
1/2 cup Coconut oil
2 T. lemon juice or vinegar
several drops essential oil(s) of choice (totally optional) I added a combination of sweet orange and lemon in the essential oils.

Combine in a jar or bottle with a tight-fitting lid. Shake well before each use. Pour a little on a dry, soft, cotton rag and rub into wood. Buff gently with a clean, dry cloth to remove excess polish (too much left on the finish will attract dust).
A small dowel sharpened in a pencil sharpener and wrapped in a cleaning cloth can help get the grunge out of intricate carvings. All the experts seem to agree that dry dusting is the best, safest way to do your regular cleaning, but a dry rag wasn’t going to faze the green mold.

Thursday, July 26, 2012

Eco-Friendly Dishwasher Detergent

I tried this one because it seemed so simple to make and found that it really was simple.  It worked wonderfully my dishes came out clean and sparkling.

Recipe for Homemade Dishwasher Detergent

- 1 cup Washing soda
- 1 cup Borax
- ½ cup salt
- ½ cup citric acid (I used fruit fresh) and
-1/2 cup Lemi Shine granules which I found right on the grocery shelf with other dishwasher products.  Dont get the liquid one unless you are making a liquid detergent.

Mix together and store tightly covered in a Mason Jar. Use one tablespoon per load. Add vinegar to the rinse dispenser for the best results.

At one tablespoon per load, this will last me for quite a while, I will keep track and let you know how many washings I get.  I got the basis for this recipe from http://tlc.howstuffworks.com/home/diy-eco-dishwasher-detergent.htm# .  However I added the Lemi Shine that I saw mentioned in another recipe.

Ingredients in Homemade Dishwasher Detergent

Your environmentally friendly dishwasher detergent is going to have four main ingredients.
- Washing Soda—This stuff has been around forever. It is a natural substance, made from salt and limestone. Scientifically it is known as sodium carbonate. It cuts grease on anything and can be used for many (if not most) of the cleaning projects in your home. Arm and Hammer puts it out in the United States. If you can't find it at your grocers you can find it on Amazon and other places online.
- Borax—Borax occurs naturally in the environment and can be mined as well as created in a lab. It is toxic in concentrated amounts, and you should keep it out of the reach of children. You can find it by the laundry detergent; Borateem is one brand.
- Kosher Salt—Kosher salt is a pure salt. I use it for cooking because the food tastes cleaner. It it what my recipe calls for, I am not sure why.
- Citric acid—You can buy food grade citric acid like Fruit Fresh or just use unsweetened lemonade packets.

Wednesday, July 25, 2012

Fabric Softeners & Dryer Sheets


This first article is from: 
www.wikihow.com › ... › LaundryLaundry Cleaning Products
Jul 10, 2012 

Steps

  1. Look for dryer balls at dollar stores, drugstores, grocery stores, or health food stores. They may be found in the cleaning products aisle. These reusable balls toss in the dryer along with your clothes and linens, fluffing them and enhancing drying to reduce your dryer's energy usage. Some dryer balls will contain baking soda to freshen the laundry.
  2. Gather or buy lavender buds and/or dried lemon or orange rinds (available at farmers markets, tea and herb shops, and bulk stores). Put a half cup or so in an old, clean sock (a good use for those lonely ones), tie off, and toss into the dryer with laundry to freshen. This can be used through several loads and enhanced with 5 to 7 drops of essential oils of lemon, lavender (especially good for bed linens), sweet orange, or pine (for household goods like washable rugs). When used up, the sock can be opened, emptied into the compost, and refilled several times.
  3. Betsy Jabs at diyNatural recommends scrunching up a ball of aluminum foil to toss in with laundry to reduce static buildup. The ball can be used over and over.
  4. Distilled vinegar can be added to your washer's rinse cycle to soften fabrics. This is especially useful for natural fibres. Diluted vinegar is slightly acidic, which closes the cuticle of the fibre, making it smoother.  

Warnings

  • In the unlikely event that a member of your family has skin irritation after the switch to homemade dryer sheets, suspect an allergy or contact dermatitis to one of the essential oils used. Discontinue the oils and make future sheets with one essential oil at a time until the offending oil is discovered and can be removed from the mix.
  • None of these methods should void your dryer's warranty, but to be sure check your owner's manual and customer service at the manufacturer's website before using.
     
This next article is from http://www.diynatural.com/homemade-fabric-softener-dryer-sheets/  
  • Vinegar is my fabric softener of choice.  Aside from being a natural softener, it also removes soap residue in the washing machine and reduces static in the dryer. You can add vinegar directly to laundry during the rinse cycle or pour vinegar into the fabric softener dispenser of your washing machine. I have even added 1-2 drops of my favorite essential oil to the vinegar in the softener dispenser. My mother caught me standing over the washing machine one day with a glass dropper in one hand and a bottle of lavender essential oil in the other, and commented that it looked as though I was running a science lab out of my laundry room. I feel like a scientist sometimes as I experiment with combinations of my favorite oils in the laundry.  Sweet orange brightens and fights stains, lavender offers a calming effect, and peppermint can help fight tough odors on clothing. You can pre-mix your fabric-softening vinegar by using the following recipe:

    Vinegar Laundry Softener

  • 1 gallon white vinegar
  • 20-30 drops of essential oil

  • Plain lavender is one of my favorites, or a combination of sweet orange and lemon when I need a pick-me-up on laundry day!  A third suggestion is to use peppermint, although I would cut this back to 15 drops because it is quite potent.

    Just shake well before each use and it’s ready for the rinse cycle. For small or average loads add 1/2 cup to the rinse cycle, for larger loads add about 1 cup to the rinse cycle.
    UPDATE: Once clothes are dry you will not notice the scent of this homemade fabric softener. Many readers have asked, “So why use them?” One benefit of including the essential oils is that many contain antibacterial properties and will help disinfect laundry. (Lavender, sweet orange, lemon, and peppermint (and many more!) are all antibacterial.) Essential oils like lemon and sweet orange have also been known to brighten laundry and fight stains. Feel free to leave out essential oils if you wish…vinegar is also antibacterial. I’m a sucker for essential oils in my laundry mainly because I enjoy the aromatherapy the oils provide during this mundane chore! :)
    Dryer sheets Over the past few years we have researched many alternatives to commercial dryer sheets. Why? Because there is evidence that toxic fragrance chemicals can be present in commercial dryer sheets that can be absorbed into your skin when you put your clothes on. This was enough to convince me that commercial dryer sheets might not be the best choice for my family, and the cost savings of do-it-yourself dryer sheets was an added bonus. You will love experimenting with different scents along the way, and will never have to put dryer sheets on your grocery list again!
    Cut cotton cloth into small squares. I use 5-inch squares of cotton t-shirts that I’m retiring. Add 3-5 drops of essential oil to your cloth and throw it in the dryer with your next load. These cotton dryer sheets can be used for 2 or 3 loads, each time adding 3 more drops of your favorite essential oil. Wash the cloth after a few uses and experiment with a new fragrance the next time! Some of my personal favorites are lavender, lemon, or grapefruit.
    If you don’t have essential oils and would like to try some other safe alternatives, consider the following:
  • Dampen hands with water & fluff laundry as it comes out of dryer to reduce static cling.
  • Use non-chemical dryer balls. Can be purchased at Bed Bath & Beyond for a few dollars.
  • Use felted wool dryer balls (available on etsy.com – get at least 6 to be used in each load).
  • UPDATE: If static is your issue…a ball of aluminum foil in the dryer does wonders for decreasing static! It turns into a nice smooth ball and can be left in the dryer for many loads!
I probably spend too much time in my “science lab” now, experimenting and enjoying the laundry aromatherapy. I’m also enjoying the peace of mind knowing that I am not putting chemicals into my family’s laundry.

Avoid chemical perfumes

Homemade fabric softener and dryer sheets contain only what you choose to put in them, that’s part of the beauty of making your own cleaners.  Commercial dryer sheets coat your cloths with a thin film of artificial chemical perfumes. Our sensitivity to these chemical perfumes decreases over time, but when you stop using them your senses return to normal and you won’t believe how noticeable and repulsive the artificial fragrance chemicals are.  That’s a good thing.
Your clothes will take a few wash cycles to lose the coating from commercial detergents and softeners, but the sooner you get started the sooner your family will be free from harsh chemicals and perfumes.
Try the above solution next time you do laundry… we made the switch and will never go back!
******* 

This article copied from : http://www.liverenewed.com/2011/06/how-make-homemade-dryer-sheets.html (adapted from Northern Cheapskate)
Supplies:
Directions:

1. Start by cutting your flannel into strips or squares. I made strips because they work best for rolling up as in the very top picture (the strips are folded in half the long way in the picture above).
2. Mix together 1/4 cup of natural fabric softener with 3/4 cup of water in a small bowl. Use warm/hot water to help it mix better with the softener. Use a fork or a whisk and mix quickly, but it may be a little separated and not completely combined – that’s okay.
3. Place your wipes inside the container you are going to store them in. I usually use a repurposed disposable wipes container.  You could also roll your wipes together* and stand them up in a glass jar so you can pull a wipe out from the middle.  Honestly, I’m too lazy to do this most of the time, but it is convenient and looks pretty!
*To roll your wipes up, lay them out in a line so they are overlapping.  The more they overlap, the easier they are to pull apart from the middle of the roll.  Lay your first strip down and then lay the next one over 3/4 of the first strip.  Then lay the third wipe down so it is overlapping 3/4 of the second strip, and continue until all your strips are laid out in an overlapping line.
Start rolling up the stripes, making sure to grab the underneath strips as you roll.  Once they’re all rolled up you can place them in a jar or other upright container, and start pulling the wipes from the middle of the roll.  I hope that makes sense, sorry I didn’t take a picture to better show you how to do this step.
4. Pour your softener and water mixture over the wipes and shake gently to combine. Let sit for at least an hour so the wipes can absorb the solution before you use them.
5. Shake the container a little before using, and add one sheet to the dryer with each load of laundry. It’s okay if the solution is not evenly distributed on the wipe, or if the wipe is not completely moist, it will still work just fine.
6. Dry your clothes as usual.
Enjoy your soft, lightly scented, and chemical free clothing!
If you want to use fabric softener as a part of your laundry routine, this is a great way to save money and extend your bottle of natural fabric softener, which can be a little bit pricey. You can also use Ecover’s Fabric Softener to make a great natural air freshener .
__________________________________________

Tuesday, July 24, 2012

Four Easy Homemade Cleaners:


This article is copied from:  http://www.macheesmo.com/2011/01/four-homemade-cleaners/  the credit is all for them, and I plan to try this as quickly as possible.

Four Homemade Cleaners

homemade cleanersThis was easier than I thought it would be.  One of this sites goals for the year was to ditch some of their standard cleaners that were used around the house and make them! Honestly, I was a bit skeptical about this project mainly because I wasn’t sure that homemade cleaners would really get the job done.
So we went out and bought a few staple ingredients and some empty spray bottles and we spent a few minutes mixing up four different homemade cleaners that have since replaced 90% of the cleaners we use around the house. For the last few weeks we’ve been using them now and I’ve been so impressed by how well they are working, I thought I’d share them all with you in case any of you are interested in ditching the chemicals.

The Cost of Cleaning. The thing about homemade cleaners is that the initial start-up costs might seem a bit high. A tiny bottle of lavender oil (.5 ounces), for example, will run you $7-$8. But the thing to remember is that for each batch of cleaning solution, you’ll be using literally just a few drops of oil.  I would guess we spent around $30 on our homemade cleaning supplies for these four solutions, but now we have enough supplies to last us years. By the time we run out of lavender oil, for example, our cost per bottle for these cleaners will be reduces to cents.
ingredients
Basic stuff.
Really Clean Cleaning. After using these solutions for a few weeks, what I’m most impressed with is their cleaning power. They really work. Not only do they work, but I get the strange impression that they are even cleaner than the standard products.  When you clean a counter with the all-purpose cleaner it’s squeaky clean and the whole room smells awesome, not chemical at all. I hate to say this, but having these easily accessible actually makes me like cleaning.
My ultimate decision to post on these solutions was just because they worked surprisingly well.
The Basics. We did some research on books for home cleaning solutions and I would recommend these two to anyone who wants to learn more:
- Green Clean including vinegar, citrus fruits and baking soda
- Homemade: How to Make 100′s of Everyday Products
As far as ingredients go, a good number of ingredients you will probably have on hand already at home. Things like vinegar, baking soda, citrus, etc. Those are easy.
The tricky stuff are these items:
close up
Some of these are a bit expensive.
Most of the recipes involve castile soap and a few drops of essential oils. These are the pricey items and the ones that you won’t need to buy very often even if you make a ton of these solutions.
For the recipes I’m giving in this post, you’ll need the below items. You can find all of these at your local supermarket or health food store or you can grab them from Amazon. I’ve included links to the amazon pages.
- Castile Soap - An all-natural soap that’s surprisingly strong. A few drops go a long way. We like the lavender scent, but they have others available.
- Lavender Oil – A natural anti-bacterial oil that smells wonderful.
- Tea Tree Oil – A natural oil that cleanses and disinfects.
- Washing Soda – Sodium Carbonate which is just a strong base that works great as a laundry detergent. It has a million uses around the house.
Mixing the Solutions. If you’re going to do this, definitely buy new, clean plastic bottles. Don’t use old bottles as the trace chemicals in them might react badly.
Also, I’d recommend getting some labels because while they are all different, these solutions all look a bit similar.
The Recipes!
Let’s start with an easy one.
Lavender Anti-Bacterial Spray
- 1 Cup water
- 20 drops lavender essential oil
Easy right?! It’s smells great and lavender is very high in linalool which is naturally antibacterial.
adding oil
Just a few drops...
The next recipe is the one that we use the most which is the all-purpose cleaner. It’s our daily cleaner now on everything from counters to floors.
One note about this one is that it will bubble A LOT (think high school science volcano) so make sure you leave plenty of room in your bottle for an eruption and mix it over the sink just in case.
All-Purpose Cleaner (Watch out for a reaction! It will bubble a lot.)
- 3 Tablespoons vinegar
- 1/2 Teaspoon washing soda
- 1/2 Teaspoon castile soap
- 2 Cups hot water
I think you can see how little of each ingredient is used for a batch.   Note from Barbara:  I found this not to be as effective as I had hoped.  for an All Purpose Cleaner to be kept on hand.  Works well mixed in sink and used immediately but doesnt seem to hold up to being stored for use.  I will keep looking for an All Purpose Cleaner that I like better.
mixed up
All mixed up.
The next formula is the one we use on the stove or any place that accumulates a lot of oil or grease.
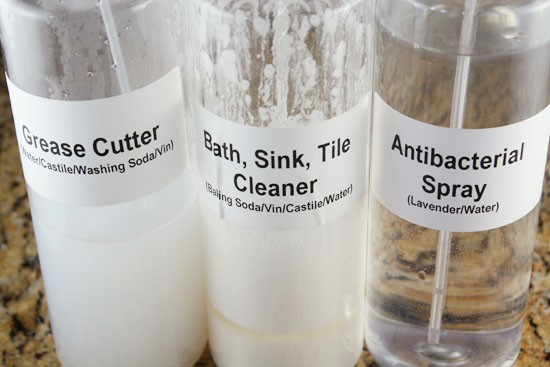
Grease Cutter (Note that if you have a good eye, I messed up the label on this one for my bottles.)
- 2 Cups water
- 1/4 Cup castile soap
- 10 drops lavender oil
And finally the strongest of the solutions that we made which is for really scrubbing hard to clean areas like bathroom sinks and mildewed tubs.
Bath, Sink, Tile Cleaner (Again, watch out for some bubbling.)
NOTE: Ideally, mix this one in a SQUIRT bottle, not a SPRAY bottle. It’s pretty thick and almost a paste.
- 2/3 Cup baking soda
- 1/2 Cup castile soap
- 2 Tablespoons vinegar
- 1/2 Cup water
- A few drops of Tea Tree oil
cleaners again
Labels definitely help.
Like I said, we’ve been testing these out for the last few weeks now and I really love all of them. My favorite is the all-purpose cleaner and the antibacterial spray which just leaves everything really clean and smells fantastic without being overpowering.
If you’re looking to cut out some chemicals from your cleaning products and save some money (in the long term), you should try these out!
Anybody make their own cleaning supplies? If you have a good tip or recipe, leave a comment!

If you have any questions post them here or go to macheesmo.com for lots of good information.

Pantry Organization


This is a wonderful article on Pantry Organization is on the following website: http://www.squawkfox.com/2012/07/02/pantry/

Squawkfox also provides some printable helps which you can download from their site.  I recommend you check them out.  I will picture some of them at the end of the article.

1. Raid the pantry.


food pantry
The best way to start organizing your pantry is to empty your cupboard and group your foods by type on the floor. It doesn’t matter if your pantry is a walk-in room or a modest kitchen cabinet — empty the lot to make the most of this exercise.
Canned goods in one pile, dried beans in another, spices in a stack, and baking goods far away from the kids.
Seeing your wares together on the floor can help you see what’s in stock and what’s been hanging out in your kitchen since the 80s.

2. Archive the artifacts.

Make note of all the expired items you’ve been storing in dire need of a compost bin or trash can. Check over your canned goods. If they’re expired, rusting, oozing, or bulging, toss them out!
Scrutinize the non-expired stuff you’ll never eat and donate it to your local food bank. You’ll clear space for foods you enjoy, and perhaps make better use of your pantry when preparing meals in the future.

Also, be sure to open and inspect all bags, boxes, and canisters containing grain products. Many bugs, but mostly weevils, love breakfast cereals, crackers, cookies, cake or muffin mixes, pastas, and pancake powder. They also love big bags of warm flour. If you spy a fly or bug lurking in your Wheaties, be a champ and get rid of the bag.
Kill Bugs Cold: Weevils do not like the cold. If you’re unsure about the insect activity in your flour, an alternative to chucking (what might be perfectly good food) is to freeze questionable items for at least four days. The cold kills eggs, larvae, and weevils.
To prevent future infestation, find some space in your freezer and freeze them cold. Our family stored all bags of flour in the deep freeze full time. It was a smart way to prevent food waste, and the move saved my parents some needed sanity.
For those with small freezers who cannot afford the space, be a smart shopper and buy smaller portions of these products and use them regularly.
Your kitchen floor or countertop may look like a disaster. Don’t worry — things often get worse before they get better. Hugs.

3. Get scrubbing.

I lied. Things will get better in a minute. First, grab your vacuum and get down with the biggest de-crumbing you’ve endured since discovering that chowing on potato chips often sends flying potato pieces straight into your cleavage (if you’re a woman).
Be sure to vacuum all cracks, crevices, cleavages, and spaces where grains of food could be hiding. If your pantry shelves are lined, remove the contact paper — you can reline later.
Grab a clean cloth (I use microfiber) and wipe down your pantry using a mixture of warm water and a few drops of dish detergent. Wipe it dry.
Reline your shelves with your preferred liner (IKEA sells some), or stock up on reusable non-adhesive shelf liner — just cut to size.

4. Do a pantry inventory.

With a clean pantry nearly ready to rumble, it’s time to take inventory.

Why keep an inventory?

A pantry inventory details what you have stocked, shows what needs to be added to your grocery shopping list, and may inspire you to make meals with the ingredients you have on hand.
Keeping a pantry inventory can help with meal planning since you’ll know what’s at home and what needs to be purchased. An up-to-date inventory can also make shopping less wasteful, saving you big money on your grocery budget. Who knows, maybe you can skip a supermarket trip!
What to record:

Item: What’s in your pantry? List canned goods, rice, dried beans, spices, cereals, snacks, quinoa, oatmeal, etc.

Quantity: How much is in stock? Do you have canned tomatoes to make stew this week? Quantity is an ongoing itemization of what you have in stock and what is about to run out. Make sure the kids update this column too!

Item Cost: You keep your grocery receipts, right? Go ahead and list the money spent on your food. It’s easiest to update when you’ve just done the groceries and restocked your pantry. This column can be a real eye-opener when you add up the total cost.
If you’re loving this level of organization, go ahead and check out this very popular post on refrigerator organization.

5 Steps to a Freshly Frugal Fridge
What’s inside your refrigerator? Prevent food waste and save money by getting your fridge organized and storing items in the smartest spots.
organized fridge
Lots of helpful tips, great graphics, and easy steps to keep your food fresher, for longer. Check out The Organized Fridge for the details.
When you’re done listing all your pantry wares, stick your inventory on the inside of a door. Update as needed.

5. Get in the zone. Reload.

Before restacking everything back on the same old shelf, consider the spots where everyday foods could be placed to make access easy. For example: Shoving your favorite breakfast cereal behind a wall of canned goods is a bonehead move, unless you’re hiding those tasty oats from a kiddlet or husband.

Pick a pantry zone.


A few organizational ideas to get your pantry perfect:


pantry storage
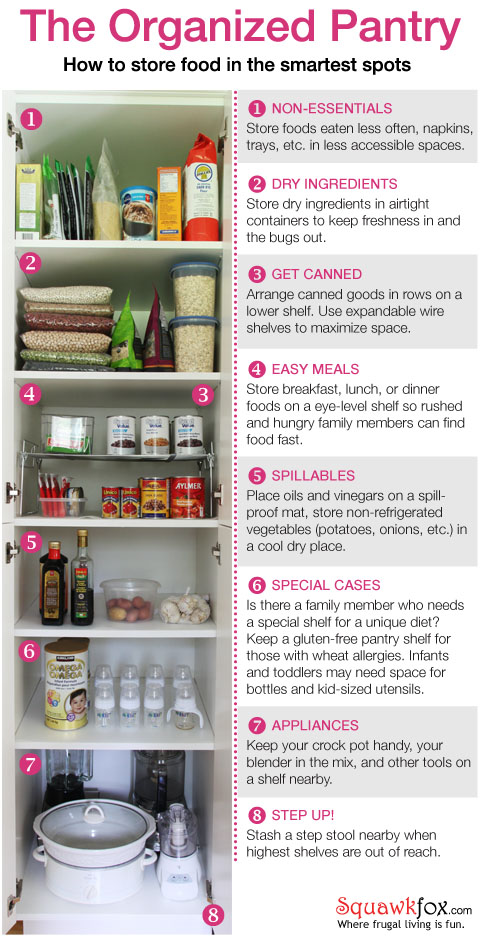
Zone 1: Non-essentials. Store foods eaten less often, napkins, trays, etc. in less accessible spaces.


gluten free pantry
Zone 2: Dry ingredients. Store dry ingredients in airtight containers to keep freshness in and the bugs out. Clear containers alert you to when stock is running low.


pantry cabinet
Zone 3: Get canned. Arrange canned goods in rows on a lower shelf. For safety, don’t stack high. Use wire shelves to maximize space.
Zone 4: Easy Meals. Store breakfast, lunch, or dinner foods on an eye-level shelf so rushed and hungry family members can find food fast.


kitchen cabinets


Zone 5: Spillables. Place oils and vinegars on a spill-proof mat, and store non-refrigerated vegetables (potatoes, onions, etc.) in a cool dry place.

baby bottle


Zone 6: Special cases. Is there a family member who needs a special shelf for a unique diet? Keep a gluten-free pantry shelf for those with wheat allergies. Infants and toddlers may need space for bottles and kid-sized utensils.
kitchen appliances 
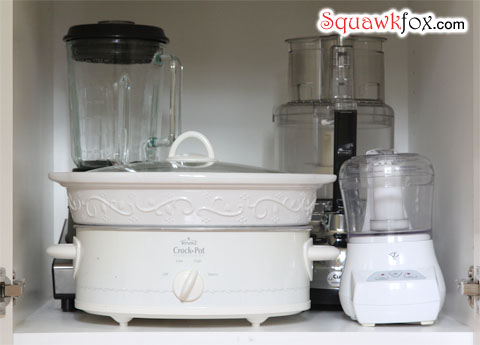
Zone 7: Appliances. Keep your crock pot handy, your blender in the mix, and other tools on a shelf nearby.
 
Zone 8: Step up! Stash a step stool nearby when highest shelves are out of reach.

A few pantry organization tactics:
  • Get grouped: Group similar stuff together by food type or meal. Dry goods on one shelf, canned on a second, spices stored in labeled jars, oils and vinegars on a spill-proof mat, non-refrigerated vegetables (potatoes, onions, etc.) in a cool space.
  • Square containers: Skip the round ones — use square airtight storage containers to to keep dry ingredients fresh and maximize your space. Square containers can be easily stacked and waste less space than round models. Airtight containers are a great tool for preventing insects from infesting your wheat products.
  • Expandable shelves: Expandable wire shelves double your space and help keep things stacked safely. Place a double wire shelf in the back of your cabinet and stack canned goods on it.
  • Don’t get canned: Never stack canned goods on the highest shelves or on top of each other — they could topple and make a mess, damage something, or even injure you. Use a wire shelf as support to safely stack double-height.
  • Shoe racks: Got an old IKEA hanging shoe rack hanging around your home? Hang it on the inside of the pantry door and store small items (potatoes, onions, spices) out of the way.
  • Bin there: Bins and baskets do a great job of separating and organizing items on pantry shelves.
Pantry rotation: Whenever you restock your shelves, rotate older wares forward from the back of your pantry. You’ll keep your food from spoiling
 
(Following are download available from SquawkFox.com )


pantry


food diary

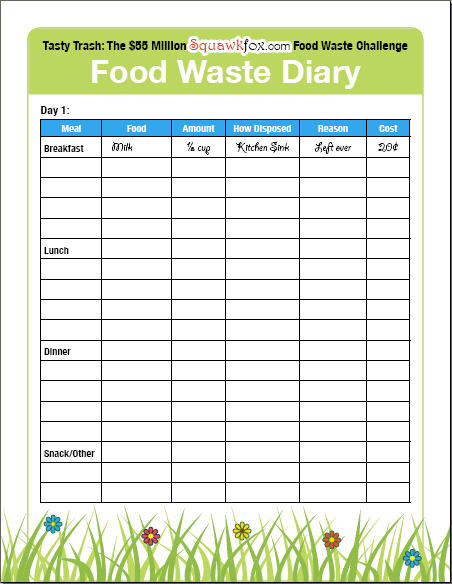
food waste diary

Monday, July 23, 2012

Cream of Tartar


Credit for this idea is given to:  http://razorfamilyfarms.com/crafts/cream-of-tartar/ (at least that is where I found it).

Cream of tartar is one of nature’s best bleaching agents.  Cream of tartar, a.k.a “crusted wine,” is mixed with baking soda to create baking powder.  While it is an acid, it’s not harmful.  It’s an acidic salt which comes from grapes. 
Use a few tablespoons of cream of tartar with hot water or hydrogen peroxide and clean any aluminum pans which have discoloration or any rusty drains, pans, or stains.
Do you have copper kettles?  Mix some cream of tarter with lemon juice and rub the copper with it.  Rinse and be amazed!  How about a porcelain sink, tub, commode?  Rub the porcelain surfaces with cream of tartar and watch the stains disappear.  Fabric stains?  No prob.  Mix a few teaspoons of cream of tartar with some glycerin and use like spray-and-wash.Just need a great nonabrasive cleaner?  Mix 2 teaspoons of vinegar and 2 teaspoon of cream of tartar in a small dish (use 3 or 4 teaspoons of vinegar and 3 or 4 teaspoons of cream of tartar if you have more items to clean).  Apply with your cleaning rag or scrub brush and let it sit for 5-10 minutes.  Scrub.  Wash with hot soapy water.

I used this picture because I have a little Scottie dog (Lacy) a golden or wheaton scottie that looks like this!  Love it!